

Hi All
Yes I am a bit shocked to say the leaset about the house, my friend who owns the house told me she was taking it off of the market for at least 2 years which is why I agreed to move into it, she also said there had been no viewings for 11 months, I move in have had 16 viewings and it sold to a young couple with a hefty 40% cash deposit, survey not done yet so who knows.
Bob was going to fit a 2" tank connector to the wall for the outlet, and then decided to use a 2" tommy drain, the kent koi dealers have really let us down this week, there are 3 dealers I have been rining and leaving messages to ring me back and not one of them have got back in touch, so I have managed to get a 3" Tommy drain and a 3" to 2" reducer.
Bob rebuilt the tent cover last week and I think I may ask him to leave it up after the pond is finished just to give a bit more protection to the Koi, it is a nice high one so I will be able to stick my head inside it and see them.
Justin, Bob is confident the window will be fine, I am sure we will get lots of photos of it while Bob is fitting it.
I have also had a visit from Maidstone planning office (believe it or not) someone and it wasn't my neighbours reported me to the council, when the planning officer came round he couldn't believe it, he thought the pond was to be a dog kennel, and told me no planning permission was needed. I then asked him when would planning permission be needed for a pond build, and he explained that any pond being dug more than 5-6 foot deep (depending on type of soil) would proberly need permission because it would need a structral survey, so I thought that might come in handy to know for any future pond builds.
We had quite a bit of snow here today, it lasted for about 3 hours, but none of it laid as the ground is so wet from all the rain we have had, so that tells you how cold it is for poor Bob to work in, I do not how he does it. Any way more updates tomorrow
Kim R's new pond build
Moderators: B.Scott, vippymini, Gazza, Manky Sanke
Re: Kim R's new pond build
Well Bob turned up and it was freezing, first he fitted the pipe for the tommy drain then cleaned the bottom and sides of the pond, laid newspaper all over the bottom of the pond and a piece of liner just to make sure the liner was protected. Then he fitted the liner, he had made up some supports to fit into the window opening siliconed the liner into place around the window then put the window cut out back into possition to hold the liner in place screwed to the supports. After fitting the liner he then did a load more work to the filters and apart from a few bits of pipework the filters are fitted. Next weekend the window and rest of pipe work and start to fill. The tent covering will remain in place over the winter as added protection but hopefully by this time next week it will be filled.
Bob took some photos yesterday of what he did so hopefully he will post them
Bob took some photos yesterday of what he did so hopefully he will post them
Re: Kim R's new pond build
The glass is being fitted tomorrow and the pipework being finished so water will be going in very soon 
-
Bob Hart

- Site Admin

- Posts: 2292
- Joined: Sun Aug 14, 2005 8:53 am
- Location: Maidstone, Kent, England
- Contact:
Re: Kim R's new pond build
All finished now, ready for filling in a couple of days once the silicone has fully cured
Window frame made from the liner worked really well
Window frame made from the liner worked really well
-
welsh_kai_boy

- Nurse Shark

- Posts: 85
- Joined: Tue Apr 07, 2009 3:12 pm
- Location: South Wales
Re: Kim R's new pond build
Anymore pics Bob?
-
Gazza

- architeuthis moderator

- Posts: 5306
- Joined: Sat Aug 13, 2005 7:24 pm
- Location: Essex,UK
- Contact:
Re: Kim R's new pond build
Well done Bob sounds good and new water going in soon
Re: Kim R's new pond build
And the fill begins

The reading on the water meter is 28843368

The water going in

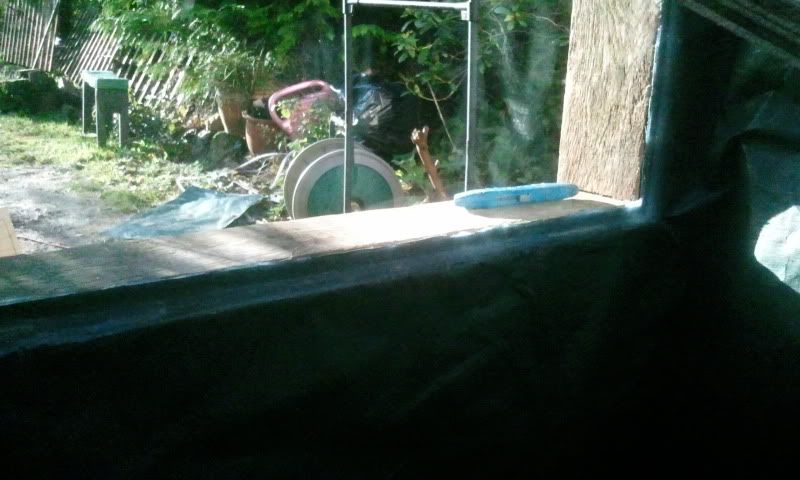
First view through the window
The reading on the water meter is 28843368
The water going in
First view through the window
-
Gazza
- architeuthis moderator
- Posts: 5306
- Joined: Sat Aug 13, 2005 7:24 pm
- Location: Essex,UK
- Contact:
Re: Kim R's new pond build
Hi Kim,
Things really coming together now
Things really coming together now
Re: Kim R's new pond build
Well here it is the final meter reading

It reads 2889.1864. We were hoping to get it to a 1000 gallons and the final total is 4849.6 ltrs which means I have a grand total of1064. Everything has gone to plan really only 1 minor adjustment to the outlet pipe to get the flow right, and only one very small leak on all the pipework.
Tomorrow I will PP it all just to make sure it is all clean then my babies can go in sometime after, I just hope the PP doesn't turn the water to brown, otherwise I will empty it and start again. I think last time I PP'd a new pond I used to much PP so I wont be doing that this time thats for sure, I don't want to put the Koi in and not be able to see them
I will try and get some photos tomorrow, Joseph just looked through the window and the first word out of his mouth was "wow" says it all really.

Re: Kim R's new pond build
Hi Kim hope you and the family had a nice Christmas
With PP once it has gone brown you can put some hydrogen peroxide into you your pond and it will make your water gin-clear again
Doses for hydrogen peroxide
Below are the dose rates for hydrogen peroxide I would use depending on the
strength of the HP again I would dilute this in a bucket full of pond water and
trickle in around the pond perimeter.
3% strength is added at 50ml per ton.
6% strength is added at 25ml per ton.
9% strength is added at 16.7ml per ton
A ton of water equals 220 galons
Re: Kim R's new pond build
Hi Pete
Thanks for that good to know if needed, I am about to PP the pond now so we will know by tomorrow if it is needed, I wouldn't of thought so this time as I know a bit more than I did the first time round a few years ago
Thanks for that good to know if needed, I am about to PP the pond now so we will know by tomorrow if it is needed, I wouldn't of thought so this time as I know a bit more than I did the first time round a few years ago
-
Bob Hart
- Site Admin
- Posts: 2292
- Joined: Sun Aug 14, 2005 8:53 am
- Location: Maidstone, Kent, England
- Contact:
Re: Kim R's new pond build
Some pictures and dialogue to explain how I made the liner window:
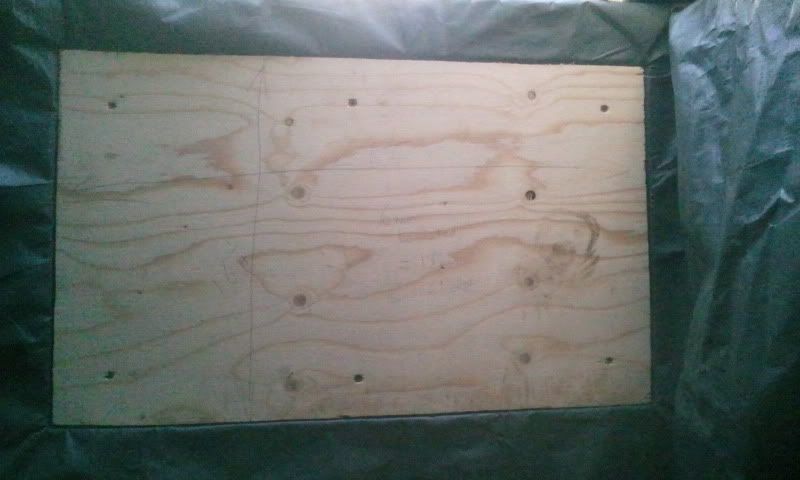
With the decision made to not glass the pond, I had to decide how to make the window frame from the liner I was now going to use.I had made the wooden frame up already from using the 20mm plywood, leaving an inch all round.
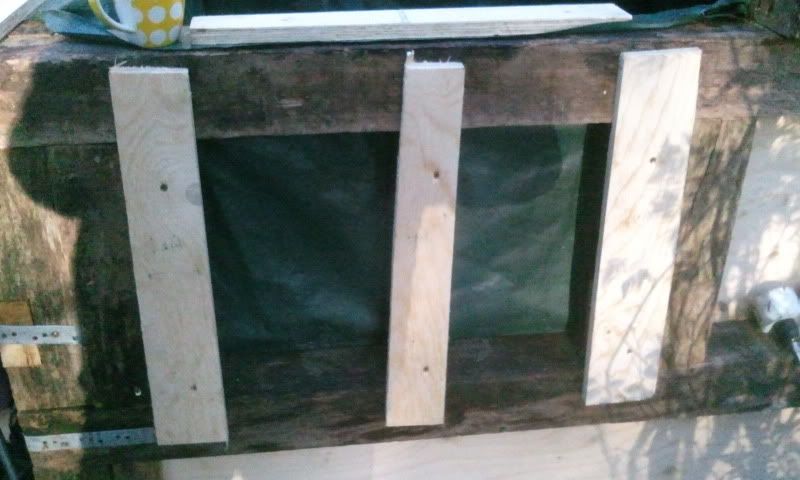
So I fitted the liner in place inside the pond and up all the sides. Now where the window frame was I smeared silicone sealent all around the edges of the window frame and just inside the plywod. I then fitted the piece I'd cut out of the plywood to make up the frame back into place, squeezing the liner into place so it went tight into the slots. Then the piece of ply was screwed threw 6 holes into other pieces of wood on the outside as shown on the second picture here
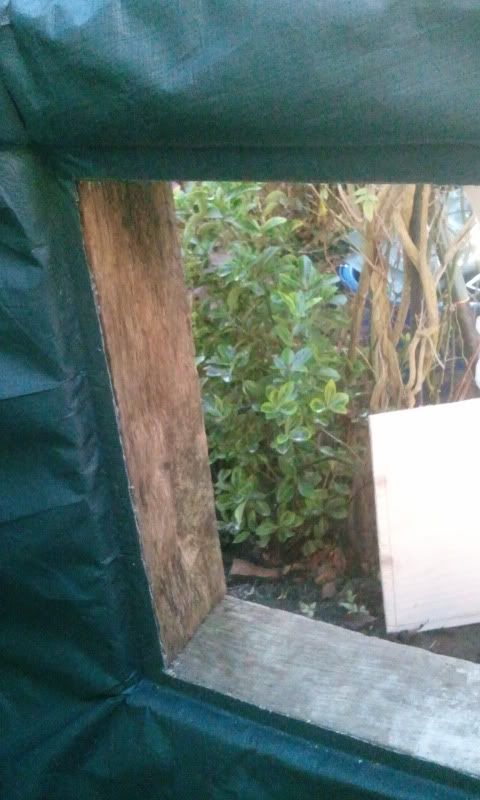
I left it a few days and returned. Before removing the plywood, I cut the liner away from the outside, I then removed the plywood and hey presto there was a frame made from the liner. It had all stuck into place into the wooden frame as you can see here on one end.
Then it was a just a case of using more aquarium safe silicone sealant to fit the glass into place, with a bead on the outside as well.
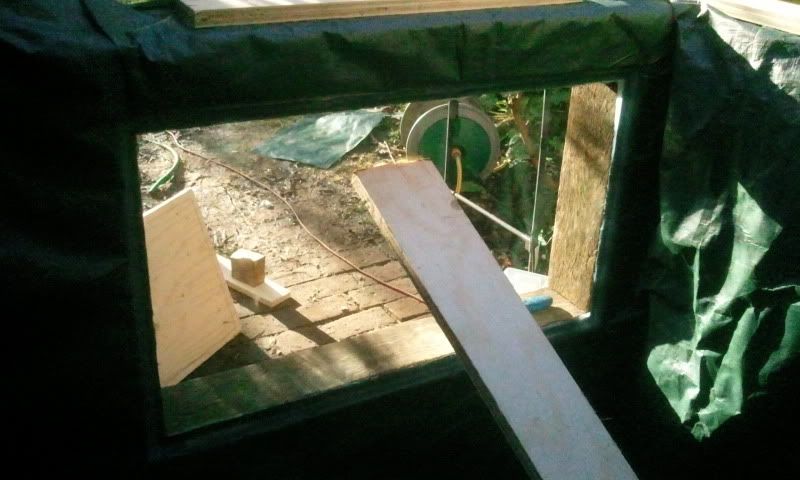
The piece of wood was just lent against the glass 'just in case'. As Kim has a rather boiserious dog, I then took the piece of plywood and screwed it onto the oiutside of the window to protect it in case he jumped up and pushed the glass inwards.
Kim then did the rest and the pond is now running, with Koi put into the pond today I hear!!!
With the decision made to not glass the pond, I had to decide how to make the window frame from the liner I was now going to use.I had made the wooden frame up already from using the 20mm plywood, leaving an inch all round.
So I fitted the liner in place inside the pond and up all the sides. Now where the window frame was I smeared silicone sealent all around the edges of the window frame and just inside the plywod. I then fitted the piece I'd cut out of the plywood to make up the frame back into place, squeezing the liner into place so it went tight into the slots. Then the piece of ply was screwed threw 6 holes into other pieces of wood on the outside as shown on the second picture here
I left it a few days and returned. Before removing the plywood, I cut the liner away from the outside, I then removed the plywood and hey presto there was a frame made from the liner. It had all stuck into place into the wooden frame as you can see here on one end.
Then it was a just a case of using more aquarium safe silicone sealant to fit the glass into place, with a bead on the outside as well.
The piece of wood was just lent against the glass 'just in case'. As Kim has a rather boiserious dog, I then took the piece of plywood and screwed it onto the oiutside of the window to protect it in case he jumped up and pushed the glass inwards.
Kim then did the rest and the pond is now running, with Koi put into the pond today I hear!!!
Re: Kim R's new pond build
Nice one Bob, very effective and looks great.
Graham
Graham
Re: Kim R's new pond build
Hi
Here they are, the very first pictures of my babies through the window

This was the first photo taken they were still in a bit of shock I think

Coming a bit closer

How good do they look (not being a little bit bias there at all)

I have only put the 4 biggest Koi in, it took them a couple of hours to get use to it, but now they come to the window when I go out to them but is way to dark to get a descent photo, they also look a lot bigger now, not quite sure how that works, but they do look a lot bigger
Here they are, the very first pictures of my babies through the window
This was the first photo taken they were still in a bit of shock I think
Coming a bit closer
How good do they look (not being a little bit bias there at all)
I have only put the 4 biggest Koi in, it took them a couple of hours to get use to it, but now they come to the window when I go out to them but is way to dark to get a descent photo, they also look a lot bigger now, not quite sure how that works, but they do look a lot bigger
-
Gazza
- architeuthis moderator
- Posts: 5306
- Joined: Sat Aug 13, 2005 7:24 pm
- Location: Essex,UK
- Contact:
Re: Kim R's new pond build
Hi Kim,
Great stuff well done Bob and the fish look great
Great stuff well done Bob and the fish look great